Success as a freelancer is all about taking your chances: blink and you’ll miss the perfect opportunity. In such a fiercely competitive market, we look at how you can get to the front of the freelance queue.

Although money talks on popular freelance platforms such as Upwork, Fiverr and Guru, quality shouts: it’s not always the lowest bidders or the earliest risers who get the cookie. The ability to present relevant examples of your work attractively and uniquely can be the difference between picking up that contract and losing it, which makes your portfolio your most valuable asset.
When it comes to such an important tool, why settle for second best? To give you the edge over your rivals, we’ve prepared a short guide to creating a stunning freelance portfolio, utilizing the powerful integration between Dropbox and MindMeister to the fullest. Read on to find out more.
3 Simple Steps to the Perfect Portfolio
Working with content? Check out these mind map examples to help inspire your future projects.
Whether you’re a writer, an artist, or a developer, being able to present your achievements is a minimum requirement when it comes to attracting new freelance clients. With the incredible range of styling and sharing options available on MindMeister, you can create a portfolio that contains all your best work while reflecting your personal brand.
Here’s how to use MindMeister as your portfolio and share it with your potential clients:
Step 1: Get the Structure Right
Your portfolio is the summation of your life’s many achievements. However, the reality is that most of the people you send it to will not have the time or inclination to read each and every item in order. It’s for this reason that structuring the content in your portfolio is so important. With a clear and logical layout, you give potential readers the best chance of finding the information they’re looking for quickly and easily.
Endless lists of links, videos and websites can be a turn-off for companies looking for freelancers. However, a well-structured mind map allows you to include deceptively large quantities of information while keeping the overall visual effect easy on the eye.
Our tip would be to split your portfolio into the types of projects you have worked on (websites, magazines, videos, etc.) and subdivide these by year or publisher. Don’t be afraid to play around a bit: the impressive versatility of MindMeister means you can drag and drop topics to organize your map differently if you decide it needs a change.
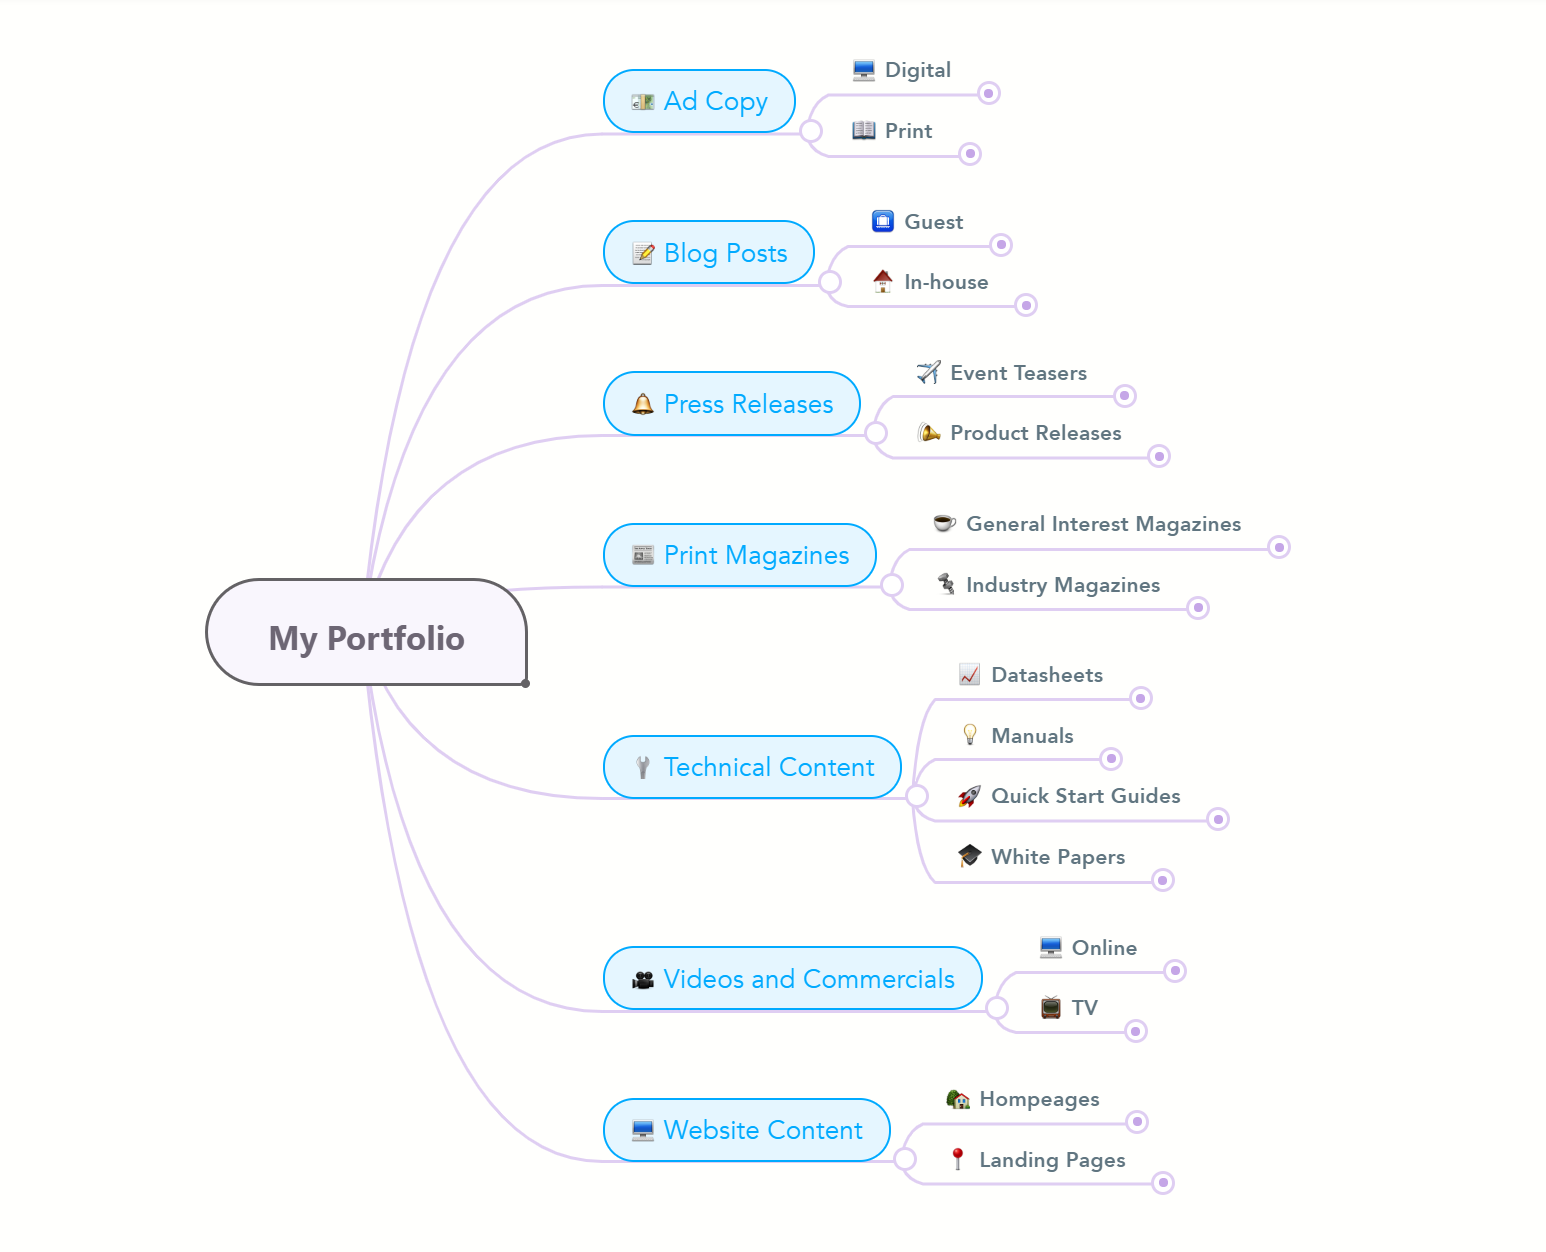
In the example below, a portfolio for a freelance writer, you can clearly see the categorization by content type, which helps readers find what they are looking for immediately.

Step 2: Dropbox it!
Keeping an independent online repository of your work as backup is imperative, even if you aren’t using MindMeister to present it. Cloud-based backups guard against you losing locally-stored data (for example if your laptop crashes), as well as providing a useful fallback if any live content belonging to you is updated or deleted over time.
One of the most popular tools for this purpose is Dropbox, an online storage facility that allows individuals and teams to store their files securely, share their files with others and even access data via mobile with apps for Android and iOS.
MindMeister’s integration with Dropbox allows you to view linked files directly from your mind maps. Linking to external content such as PDFs, videos and spreadsheets makes your mind map as informative as possible while keeping the visual effect clean and dynamic.
For the purposes of your portfolio, you might find it easier to organize your Dropbox folders in the same structure as your mind map, but this is entirely up to you.

Using Dropbox with MindMeister has a crucial advantage over attaching documents from your computer’s local storage. As your mind map contains a permanent link to the most recent version of the document, rather than an uploaded file, you only need to add the latest version of the file to Dropbox once for it to be accessible in any mind maps that link to it. If you’re maintaining multiple portfolios, this helps keep all your maps up to date with the minimum of hassle.
Step 3: Integrate!
So, you’ve got your files all safe and sound in Dropbox and you’re ready to go with your mind map portfolio. All you need to do is link them together, and you’re ready to go. Here’s what to do next:
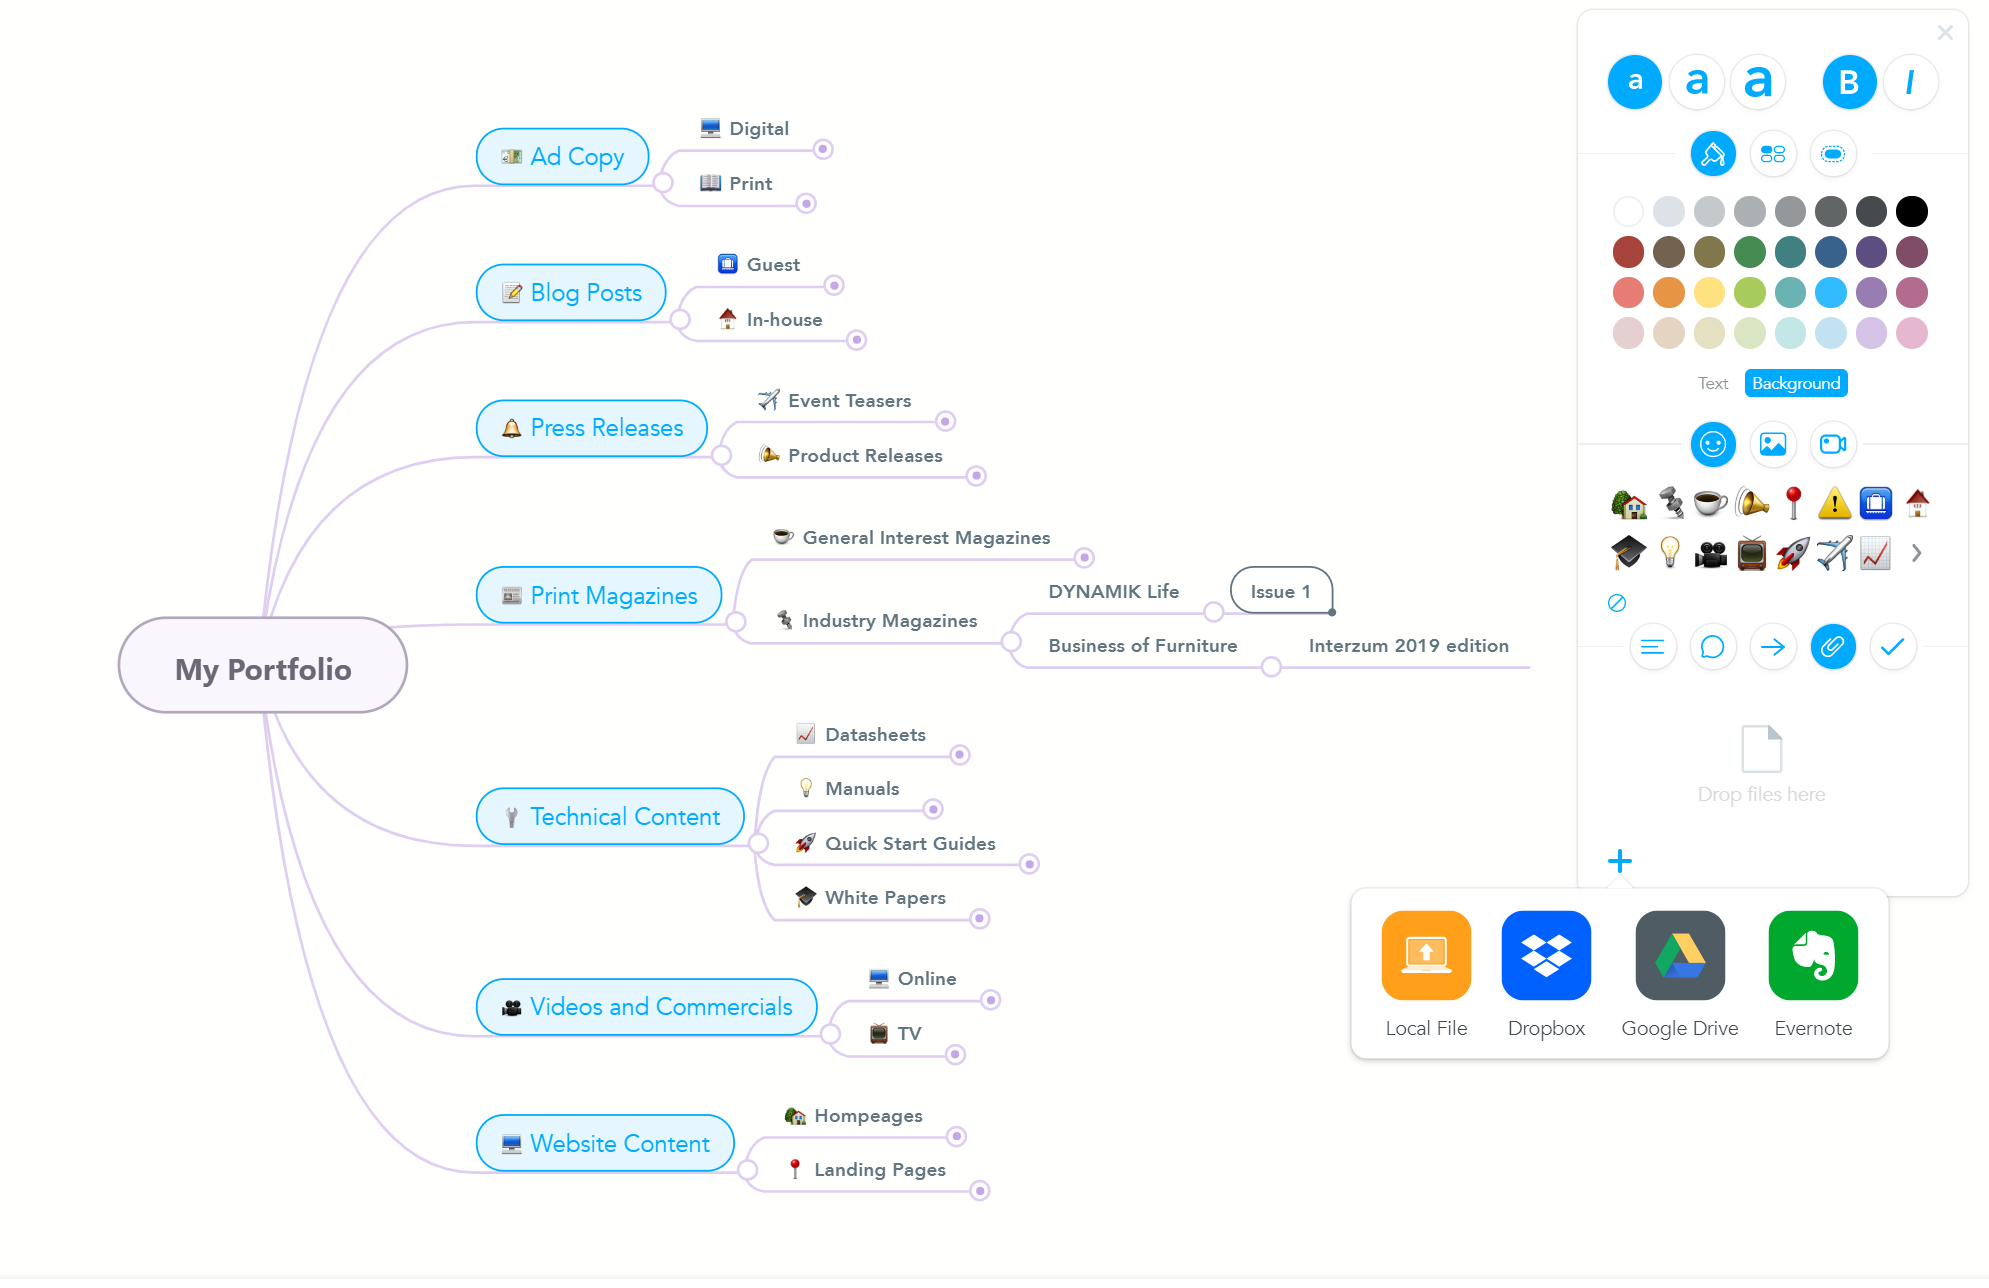
- Open your mind map and find the portfolio item (mind map topic) you want to link to a file in Dropbox.
- Click the + in the sidebar, then select Dropbox.

- Navigate to the file you want to link to in the Dropbox popup, then click Choose.

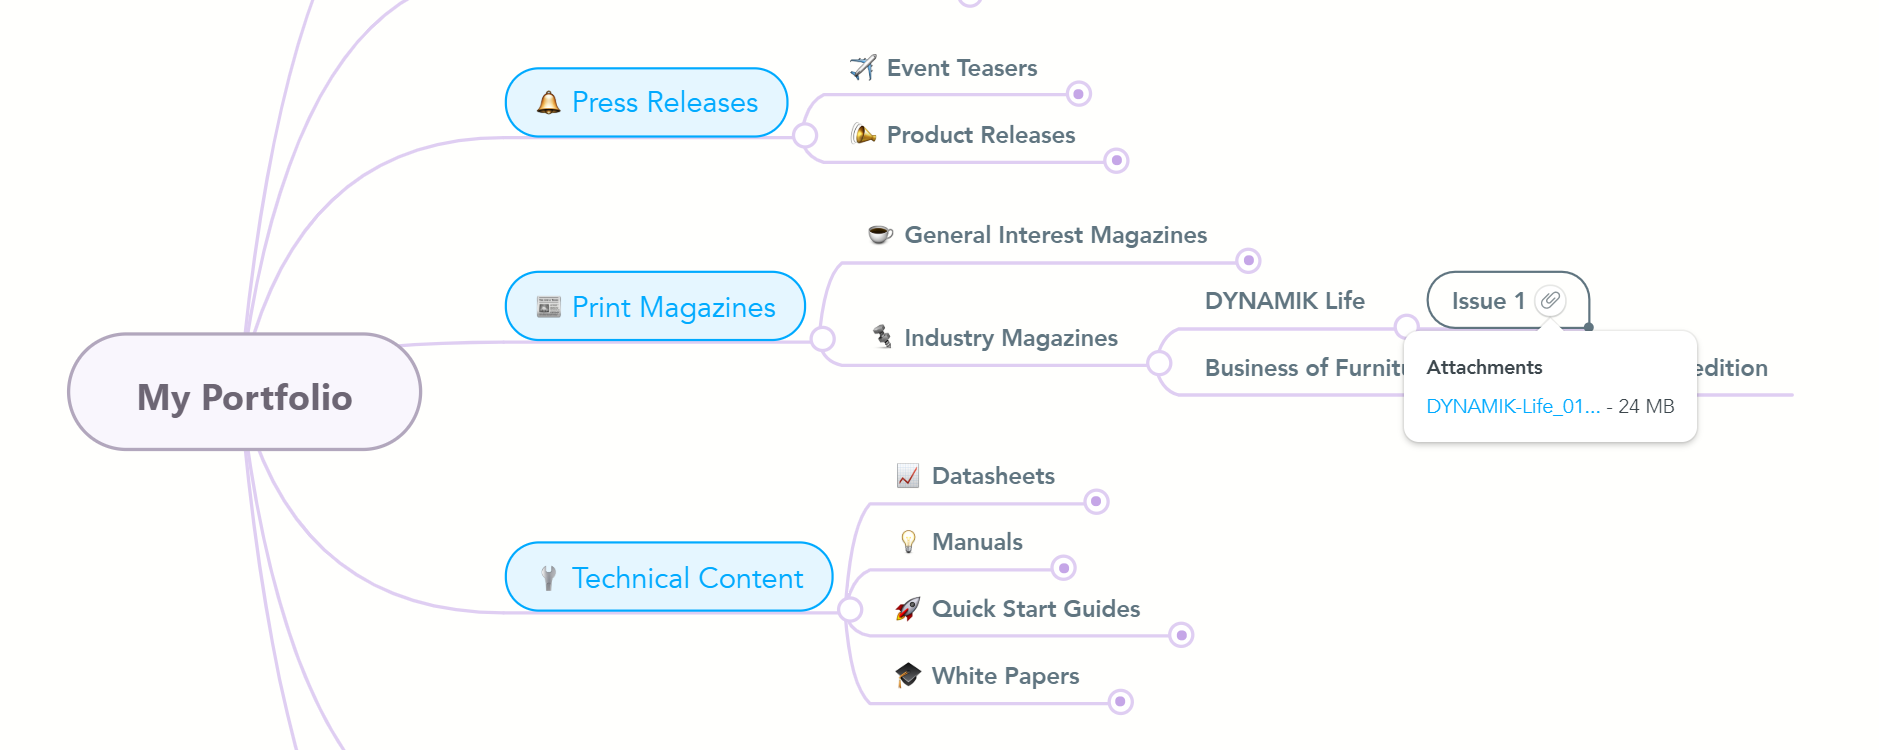
The linked file will appear whenever you hover over the attachment icon next to the topic. Click on it to open the file inline without ever having to leave MindMeister!


Having trouble? Read more about our the Dropbox integration in this help center article.
Sharing your mind map will automatically give people access to the linked Dropbox files, which means you don’t have to update sharing permissions from Dropbox itself. You can even share your maps with people who have never used MindMeister before: all attached files are visible to guest viewers with a link to your portfolio.
Make it count
You only get one chance to make a first impression: we hope the integration between Dropbox and MindMeister gives you the inspiration to present your work confidently and professionally.
Have you already tried creating an attractive portfolio with MindMeister? Maybe you’ve got an even better idea we haven’t thought of yet. Tell us all about it on Twitter by tweeting us @MindMeister.

