Whether it be studying for an upcoming exam or prepping a course curriculum for next semester’s wave of enthusiastic students — a mind map might just be the secret weapon you’re looking for. Not sure where to start? Here are two mind maps created using MindMeister templates to help you along:

Use a Mind Map to Create The Perfect Lesson Plan
A lesson plan, like a business plan, forces you to sit down and think about what your ultimate goal is. Then translate that into a clear, structured, and practical plan. Using a mind map to create your lesson plan will simplify the process, why? Because it’s easy!
It’s also fun — mind mapping mimics the way your mind processes information. It’s inherently creative and encourages out-of-the-box thinking. So, something that could otherwise be quite tedious and administrative in nature turns into something that’s creative, intuitive and comes naturally. Replace your linear hand-written notes or typed up table with a mind map and allow your creative juices to flow!
Creating your mind map using MindMeister has tons of advantages, such as:
- It gives you an overview
- You can store all your resources (pictures, videos, worksheets, documents, links) in one centralized place
- It’s online, that means it can be expanded on and edited as need be. You can also share your mind map with your colleagues and enable them to collaborate on it with you. They can use it to give you feedback, add their own ideas, or get inspiration for their own lesson plans.
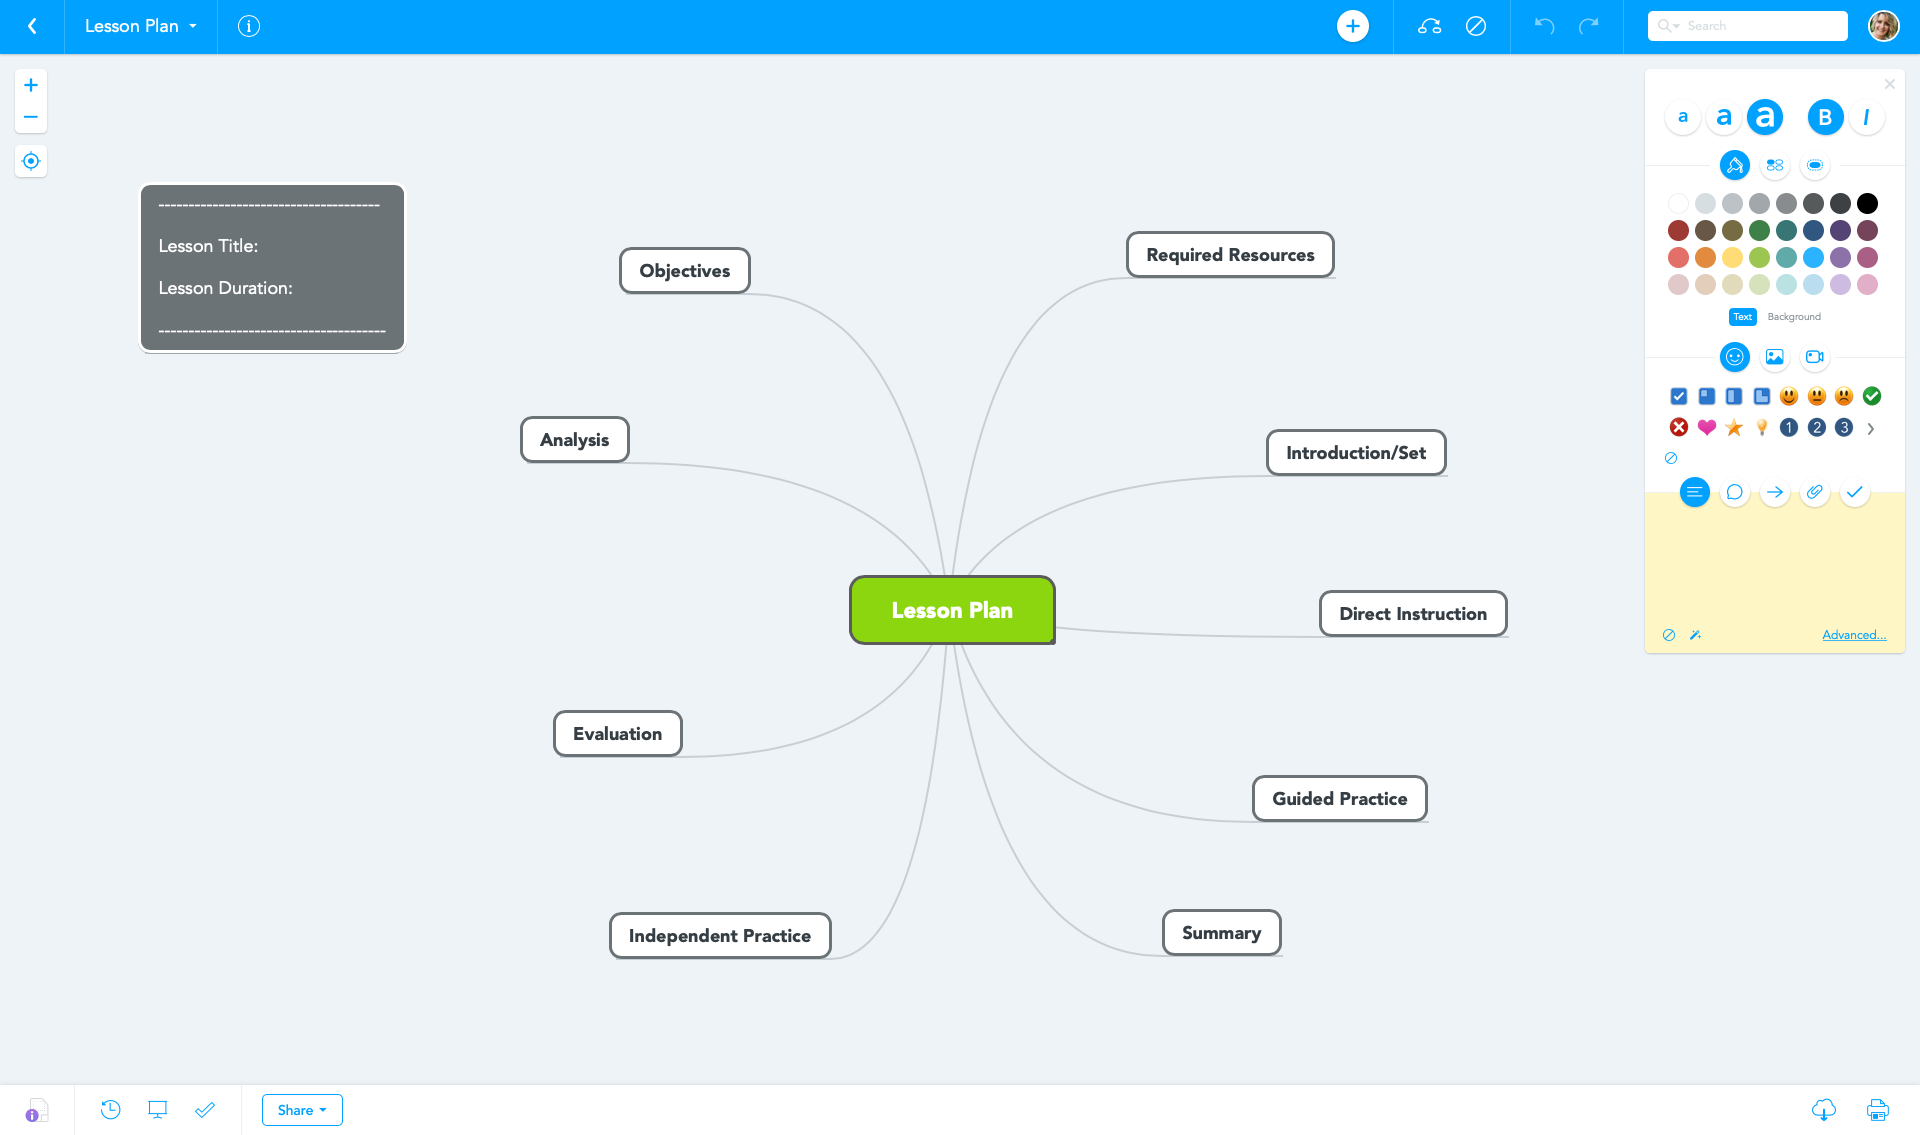
Start at the Top and Work Your Way Around Clockwise
The lesson plan template can be found in the new and improved MindMeister templates library, accessible directly from your MindMeister dashboard.
Don’t use MindMeister yet? Create your free account now and join thousands of other teachers around the world who use mind maps to empower learners, improve comprehension and more!
First off, give your lesson a title and a duration — we’ve added in a section for that in the form of a floating topic. Add the goals or rather learnings that you’d like your students to achieve to the objectives section. It’s important to be as detailed and precise as possible. Make sure that your objectives are measurable as Tracy Smith aptly points out on the Arizona State University blog:
“Effective learning objectives use action verbs to describe what you want your students to be able to do by the end of the course or unit. Aligning assessments with course expectations is much easier when you have written measurable objectives from the beginning.”
Action verbs include words such as “understand”, “describe”, “analyse”, and “critically evaluate”. Including these in your objectives will give you the framework required to assess your students.
Resources
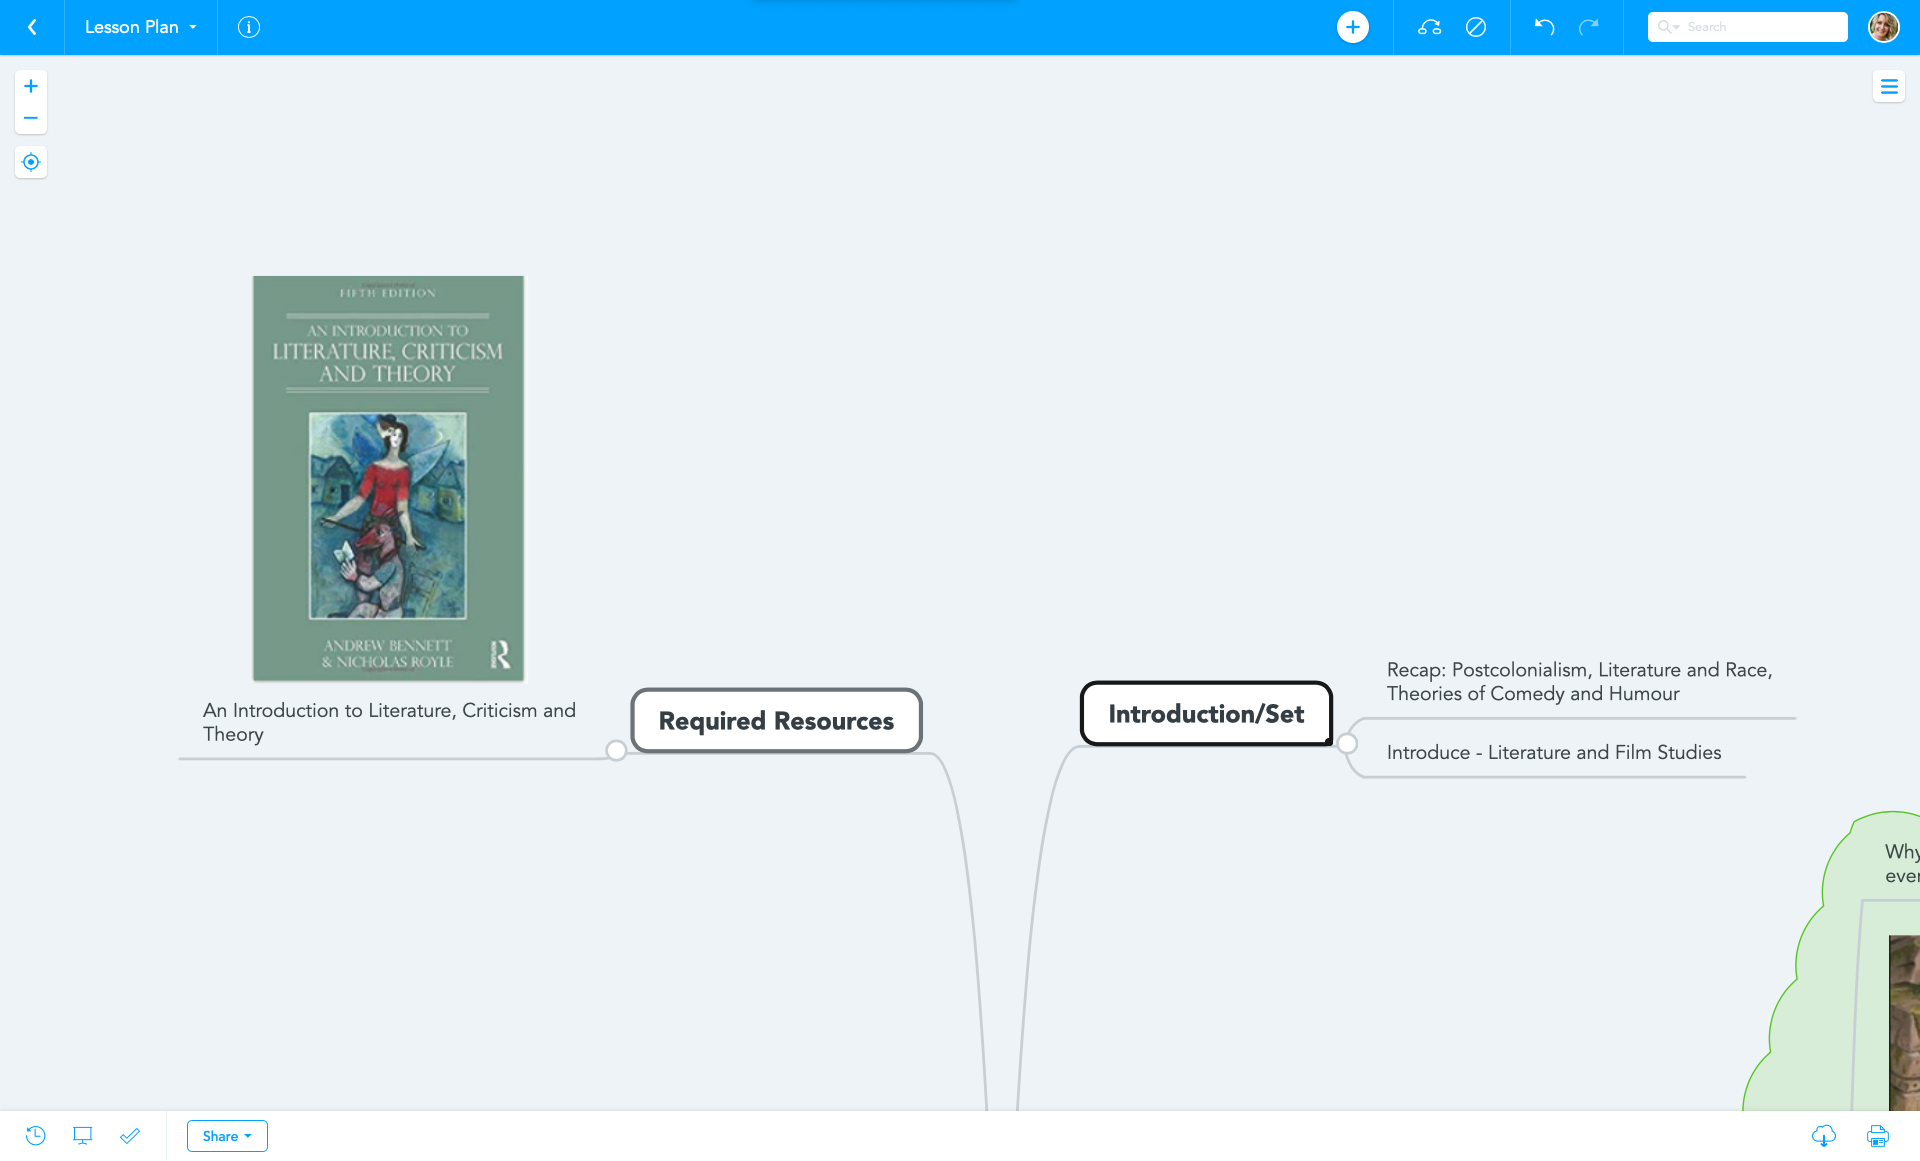
Required resources is pretty self-explanatory. This is where you can add in the course materials that your students need for that particular lesson — it could be a chapter from the course textbook or it could be a case study that your students need to work through.
Time to Teach
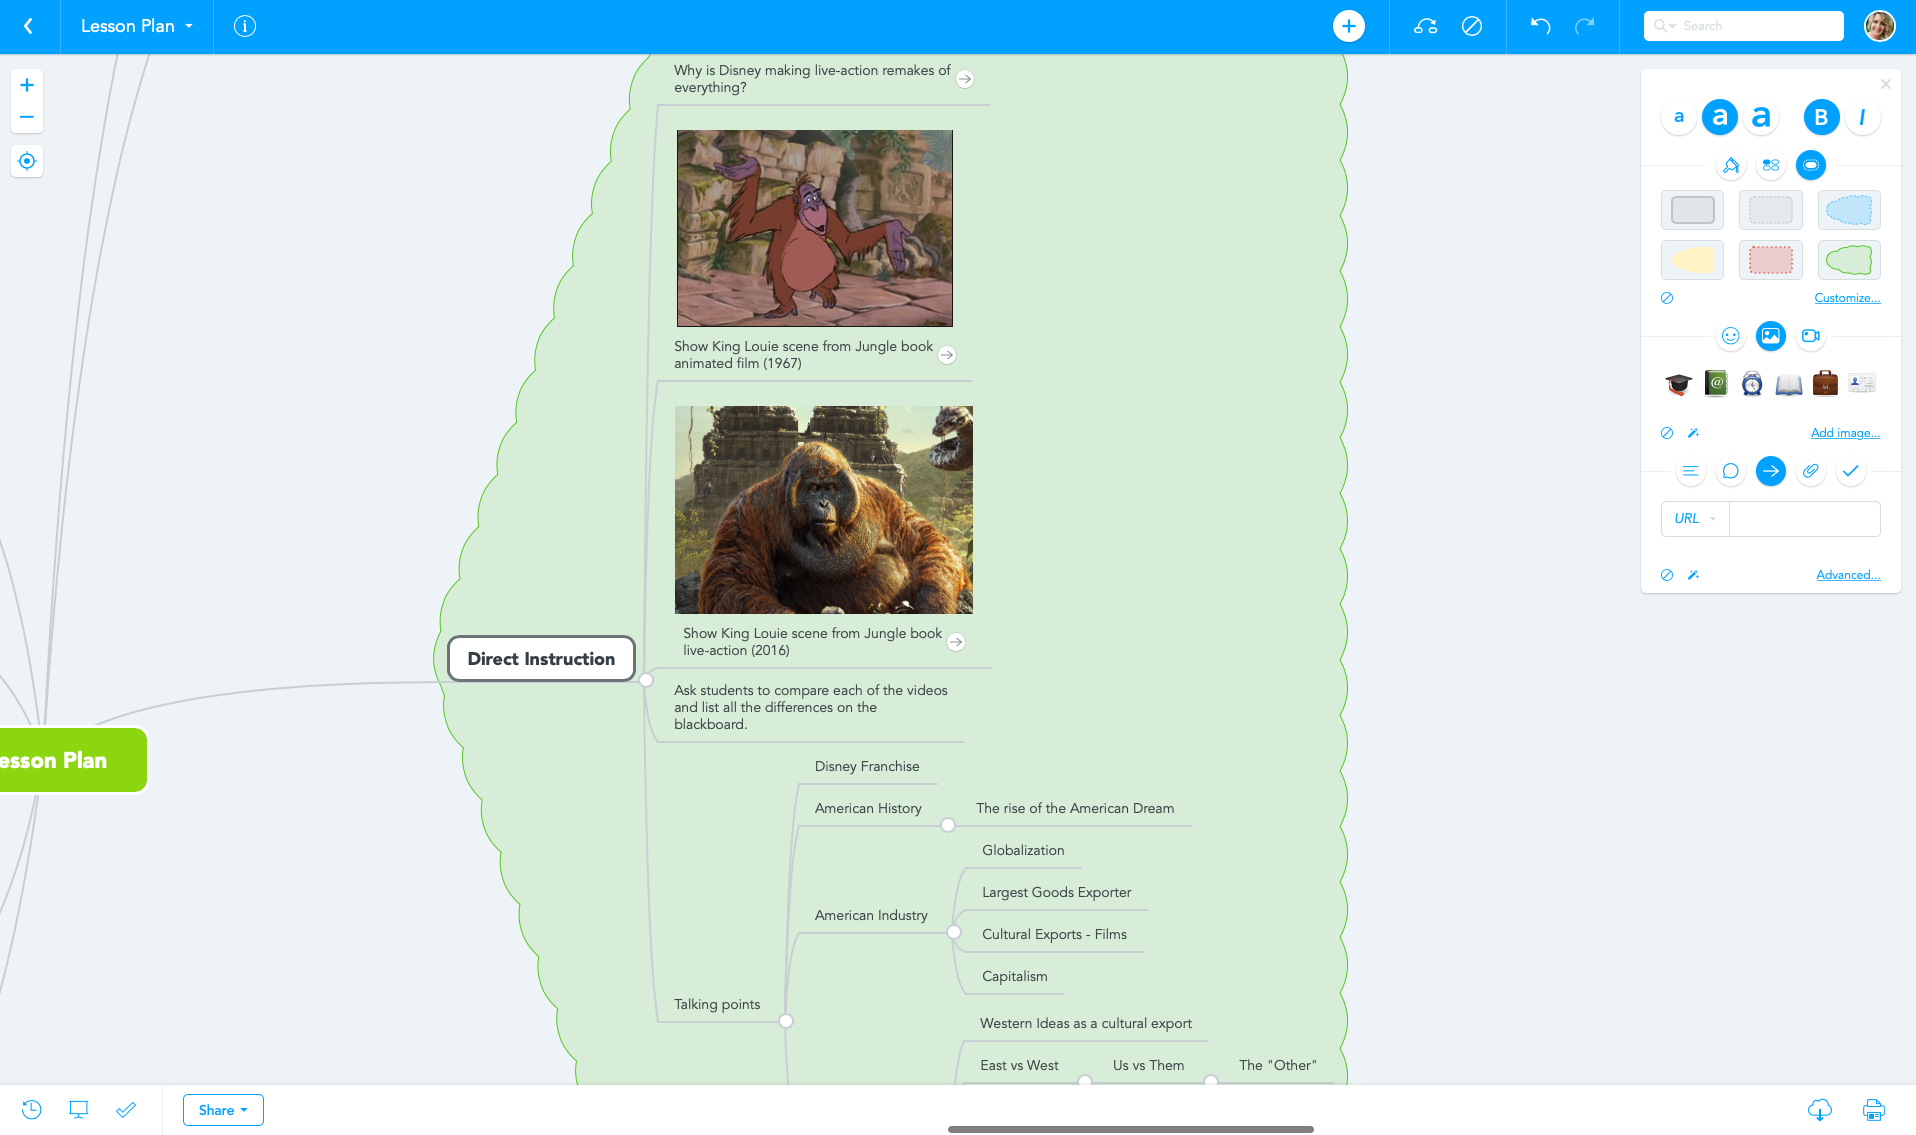
Use Introduction/Set to map out how you want to begin your lesson. Introduce new material with a little game or quiz, or better yet, go with an open-ended question that will get your students thinking. You could also include a quick recap of last week’s course material (if it’s related). Once that’s filled out, move onto the next section, direct instruction. Use the direct instruction topic to outline how you plan to deliver your lesson. Will it be through a presentation? Through a video? Note it all down here.
Guided Practice
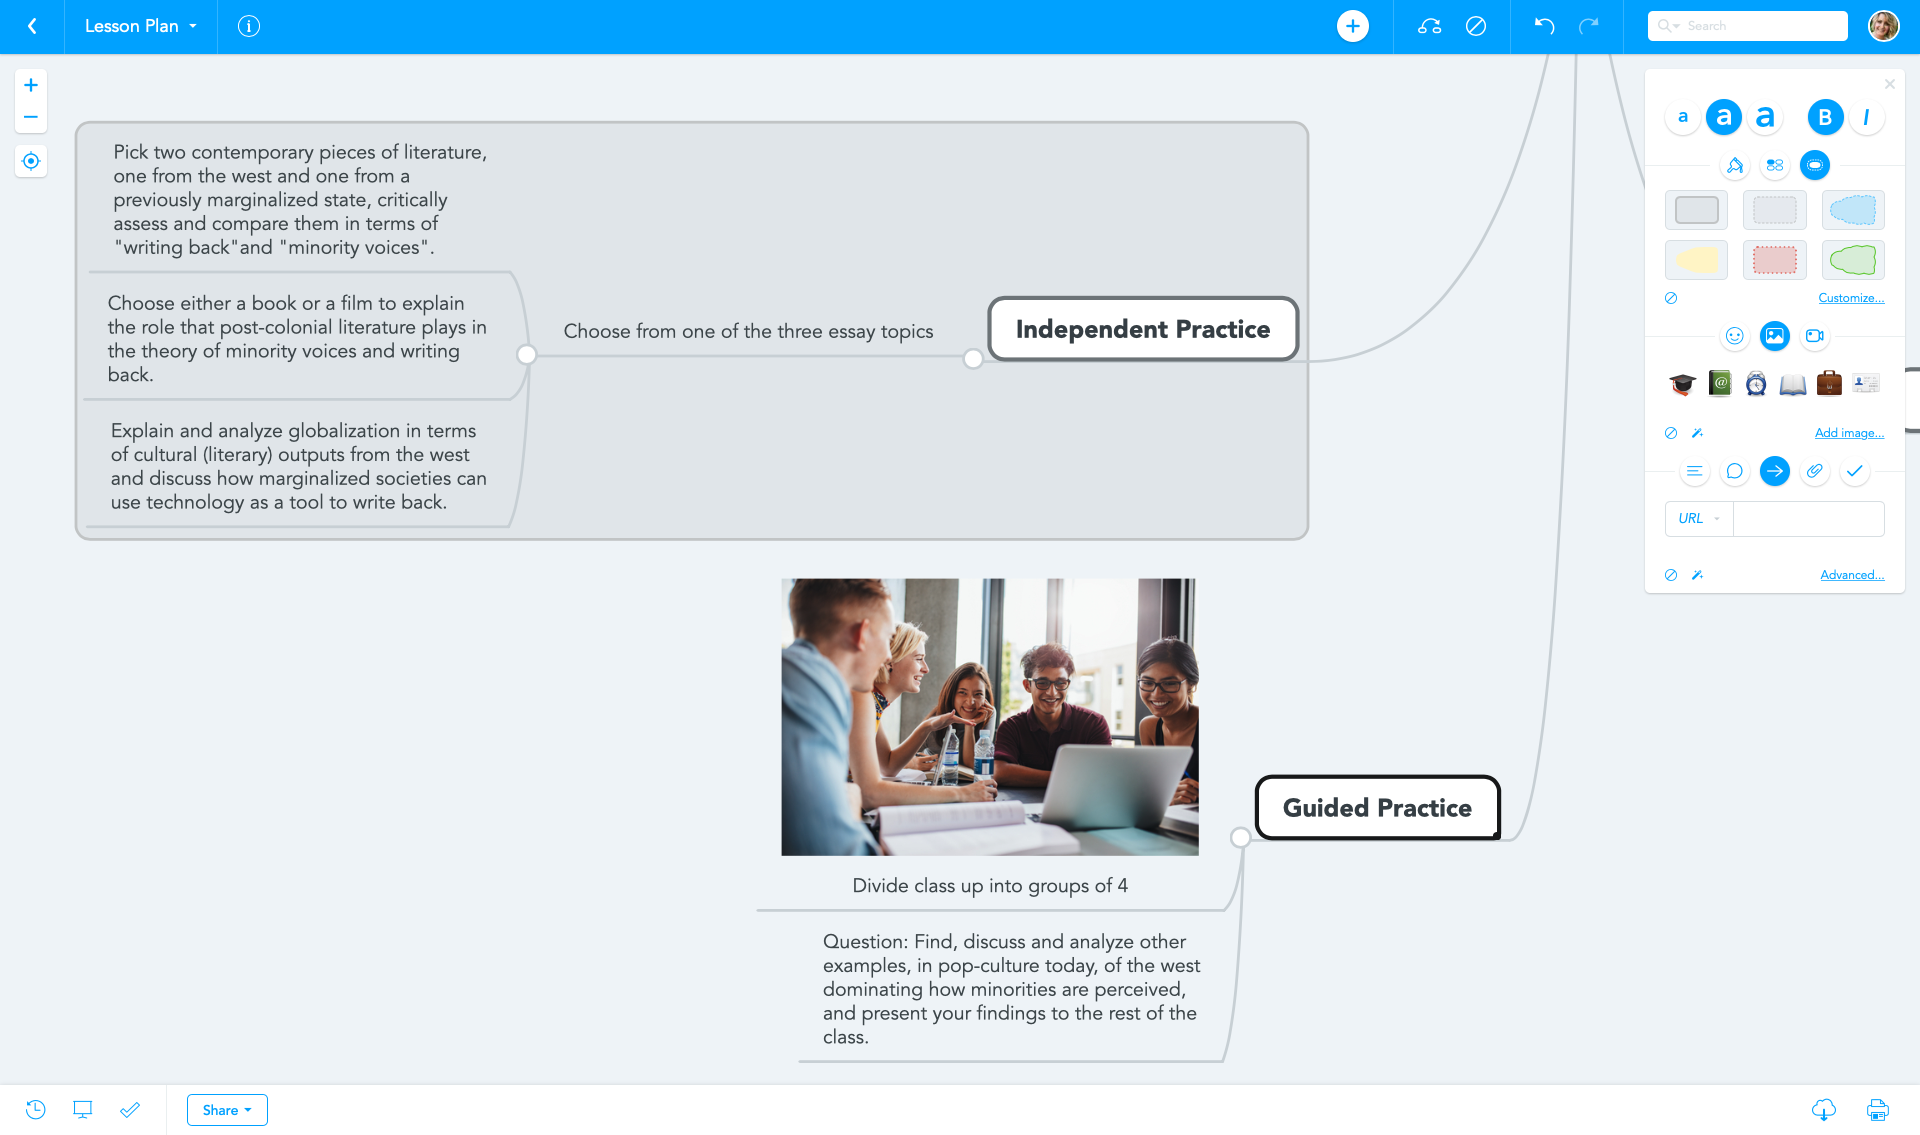
Gauge how much of the material your class understood by making them apply their conceptual knowledge through guided practice.
“In the Guided Practice section of your written lesson plan, you will outline how your students will demonstrate that they have grasped the skills, concepts, and modeling that you presented to them in the Direct Instruction portion of the lesson. This is where you let them work independently while they are still in the classroom, providing a supportive learning environment where you can empower them to work on their own, but still offer support.” — Beth Lewis
An example of guided practice would be dividing your class up into groups, and asking them to come up with a few concrete examples of how the content of the lesson could be applied in real life. This could be followed by mini-presentations where students share their findings with the class. Even though educators are often faced with time constraints, there are so many advantages to setting aside time for guided practice, as Meredith Tumilty from The Teaching Toolbox states:
“In terms of benefits, guided instructional practices are very student-centered and foster an active learning environment. Often times, guided instruction strategies are grounded in learning experiences that are authentic and have real-world applications. This, in turn, facilitates higher-order thinking skills is engaging for students. They often have a social component, which allows students opportunities to engage with their classmates, exchange ideas, and learn how to work together towards a common goal. Another advantage of guided instruction is that it gives students ownership over their education.”
Independent Practice
Next up is independent practice, the part of the lesson where students take what you’ve taught them and use that newly acquired knowledge to complete a task on their own. It’s also known as the “homework” part of the lesson. The important thing to remember here, is that students need to be able to realistically complete the assignment with minimal help or mistakes after the lesson.
Evaluation and Analysis
But the lesson doesn’t end after your students complete their homework assignments. Assess the success of your lesson in the evaluation section.This could take the form of an essay or a written test or a term project. If you assigned an essay to your students as homework, use the evaluation section to note down their results.
And finally, it’s important to see whether you’ve achieved your learning objectives or not. Assess the outcome of your lesson through the analysis of essay grades, homework assignments, and/or test scores. Have all your students passed? Have they all grasped the concepts you taught? Understanding and, more importantly, measuring your success is essential. It’s a way for you to get a better understanding of the level your students are at.
Use the analysis section in your mind map to outline your next steps. Does it involve delving deeper into a topic? Do parts of the lesson need to be repeated? Does it involve additional homework assignments?
Use a mind map to plan a lesson that will leave your students more engaged, focused and intrigued.
Need examples of how to use mind maps for business? Check out this blog post.
Use a Mind Map to Ace Your Exam
Exam time is notoriously stressful. It can be a great source of anxiety and panic for most. Especially if you’re not (or feel that you’re not) adequately prepared.
Ever strived to be the perfect student? The type of student who studied throughout the year with perfectly organized and summarized notes. You know, the type of student who was always calm ahead of exams because all that needed to be done was revision.
Unfortunately, given the jam-packed schedule that most students juggle, being completely organized isn’t always possible. What’s more, creating a concrete study plan out of a year’s worth of class notes can 1.) be overwhelming and 2.) end up taking A LOT of time. Time that could rather be used for…well…studying.
But there’s no need to dedicate any more time than absolutely necessary to creating your study plan. We’ve created a mind map template solely for that purpose.
Let’s break it down:
Instantly relieve yourself of exam anxiety by assembling all the important information relating to your upcoming exam in one place, because the more you know, the more you can prepare. The central topic is called “Exam Preparation”, but you can rename this to the name of the exam you’re prepping for. The four child topics have been organized in such a way that you get an overview of the most important aspects that you’ll need to think about in order to prepare for your exam. But remember, it’s only a template, so feel free to add or remove topics and customize it to suit your needs. Starting at the top, the topics are:
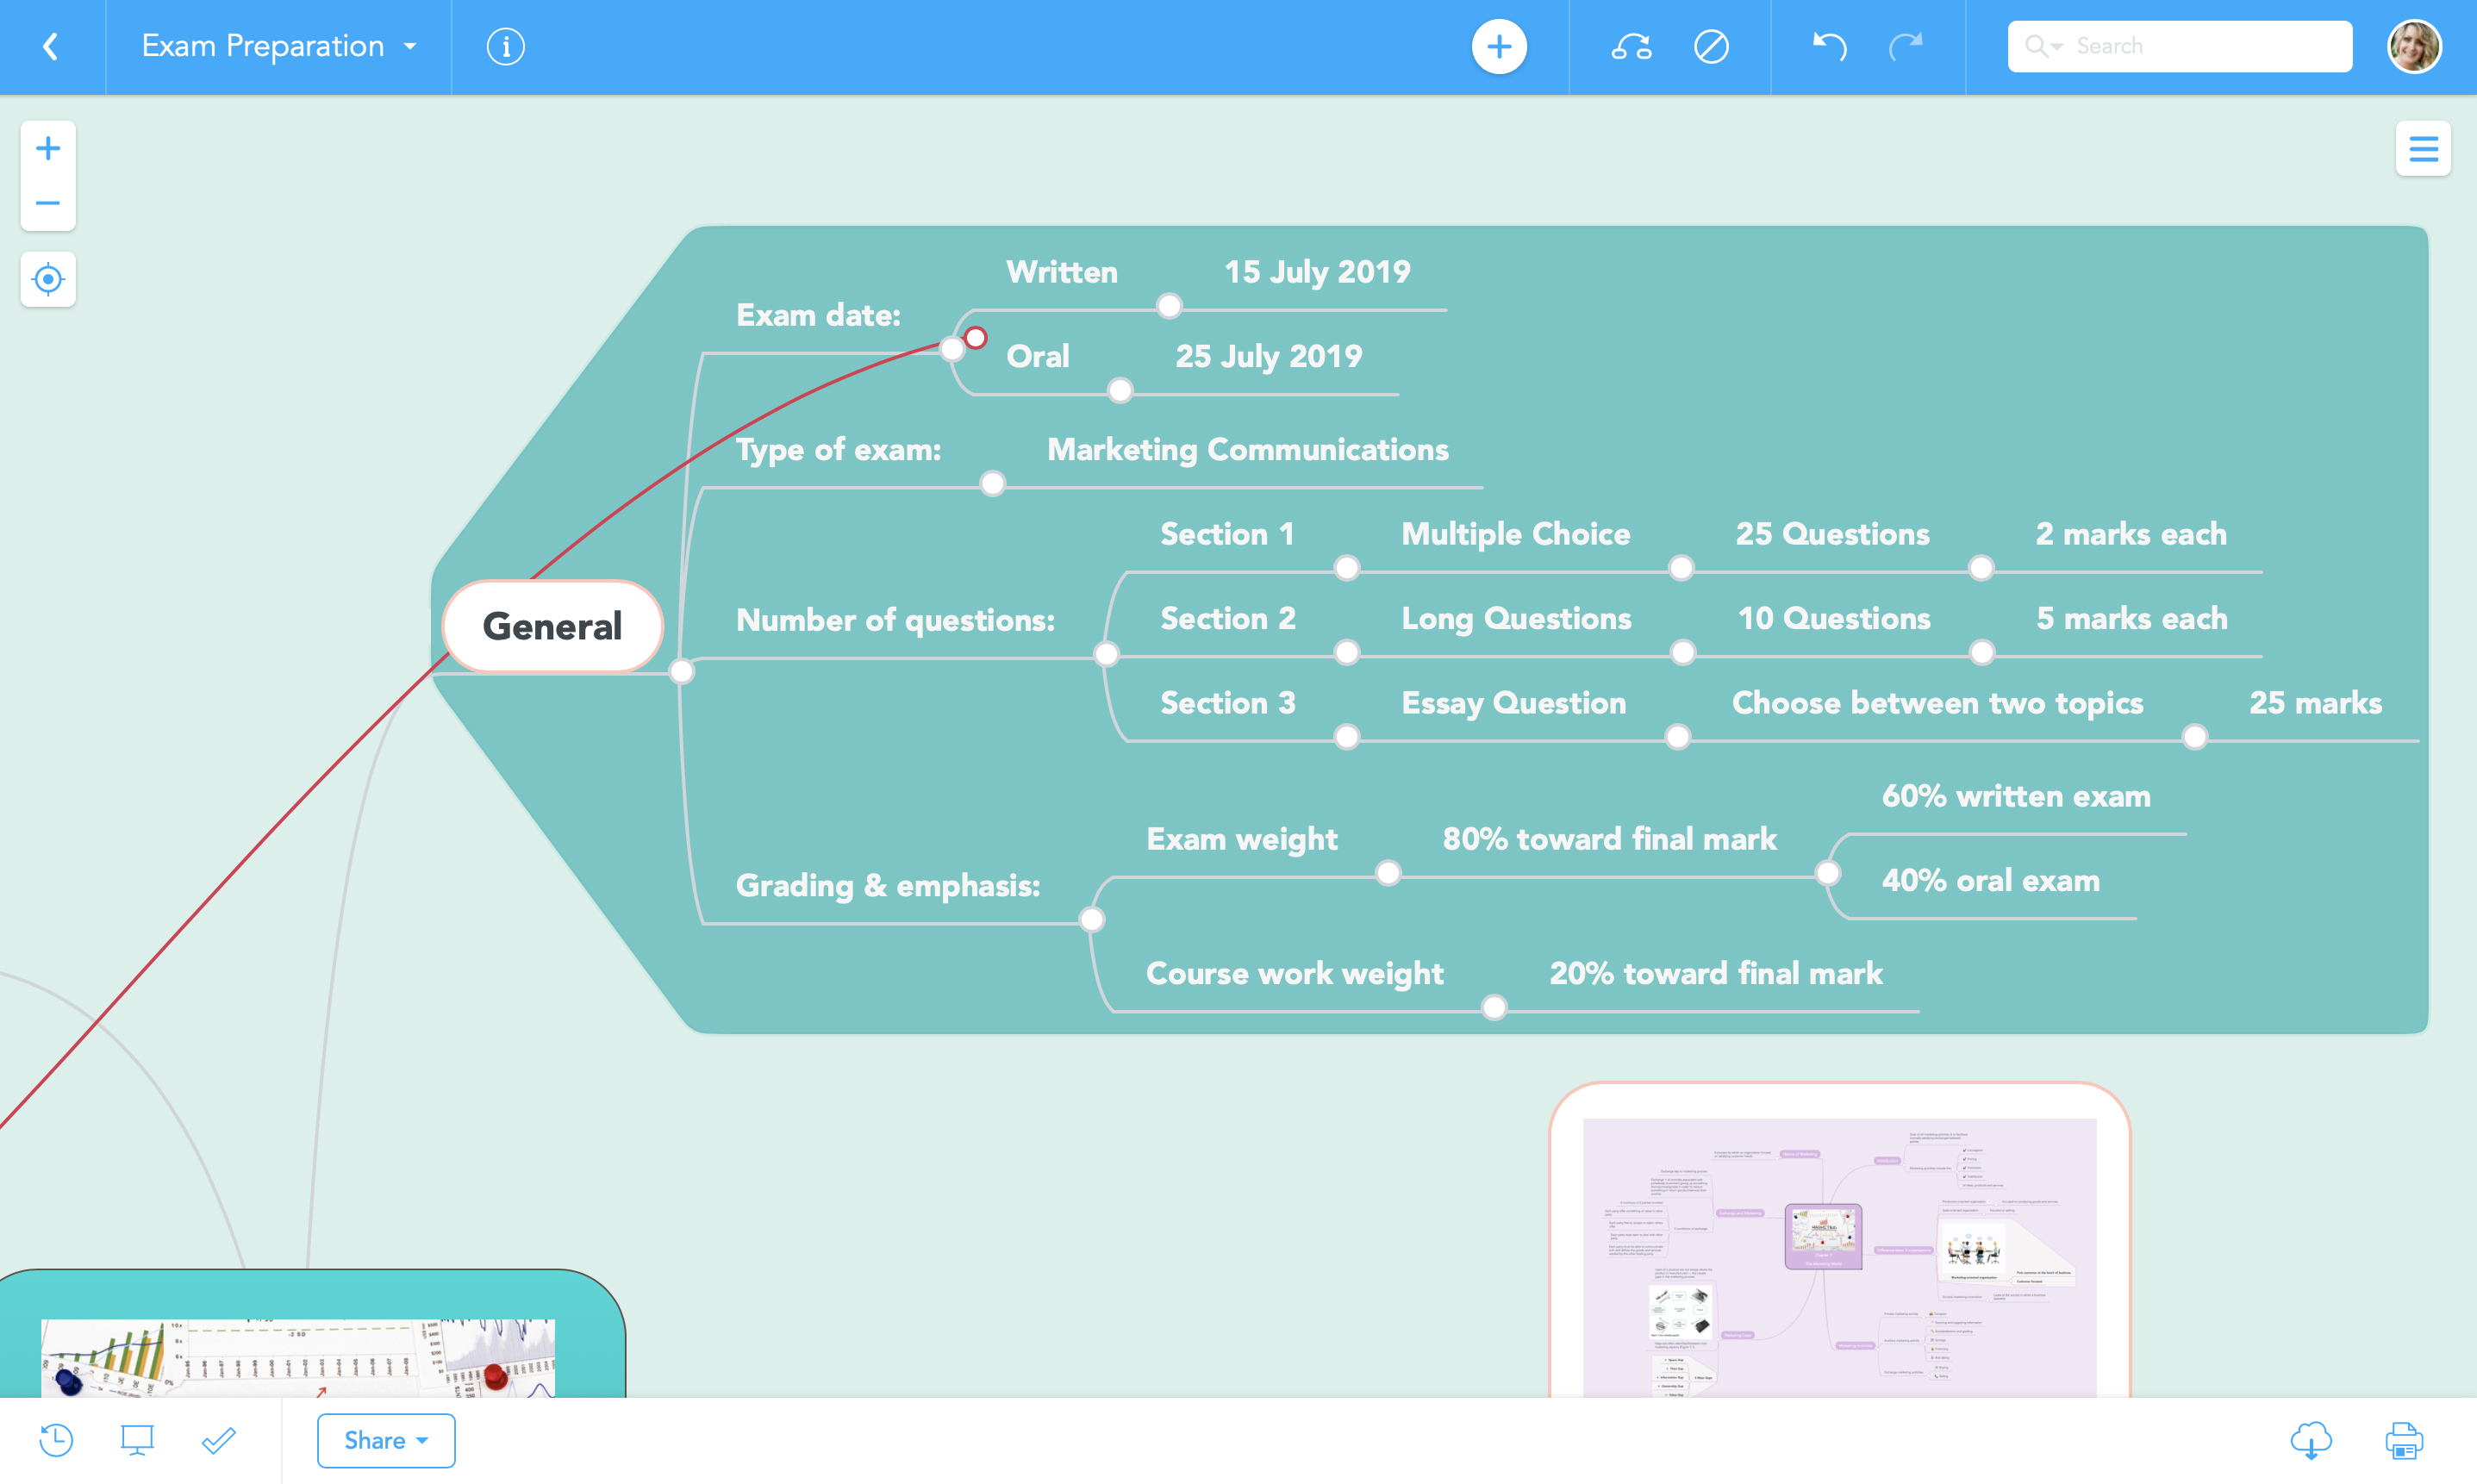
- General: Add in all the particulars of your exam such as; date, type (e.g. oral or written), number of questions, and grading. Once you’ve filled-out each section, take it a step further and add a link or links to your previous exam results. Use a connecting arrow to show the connection to the resources section.
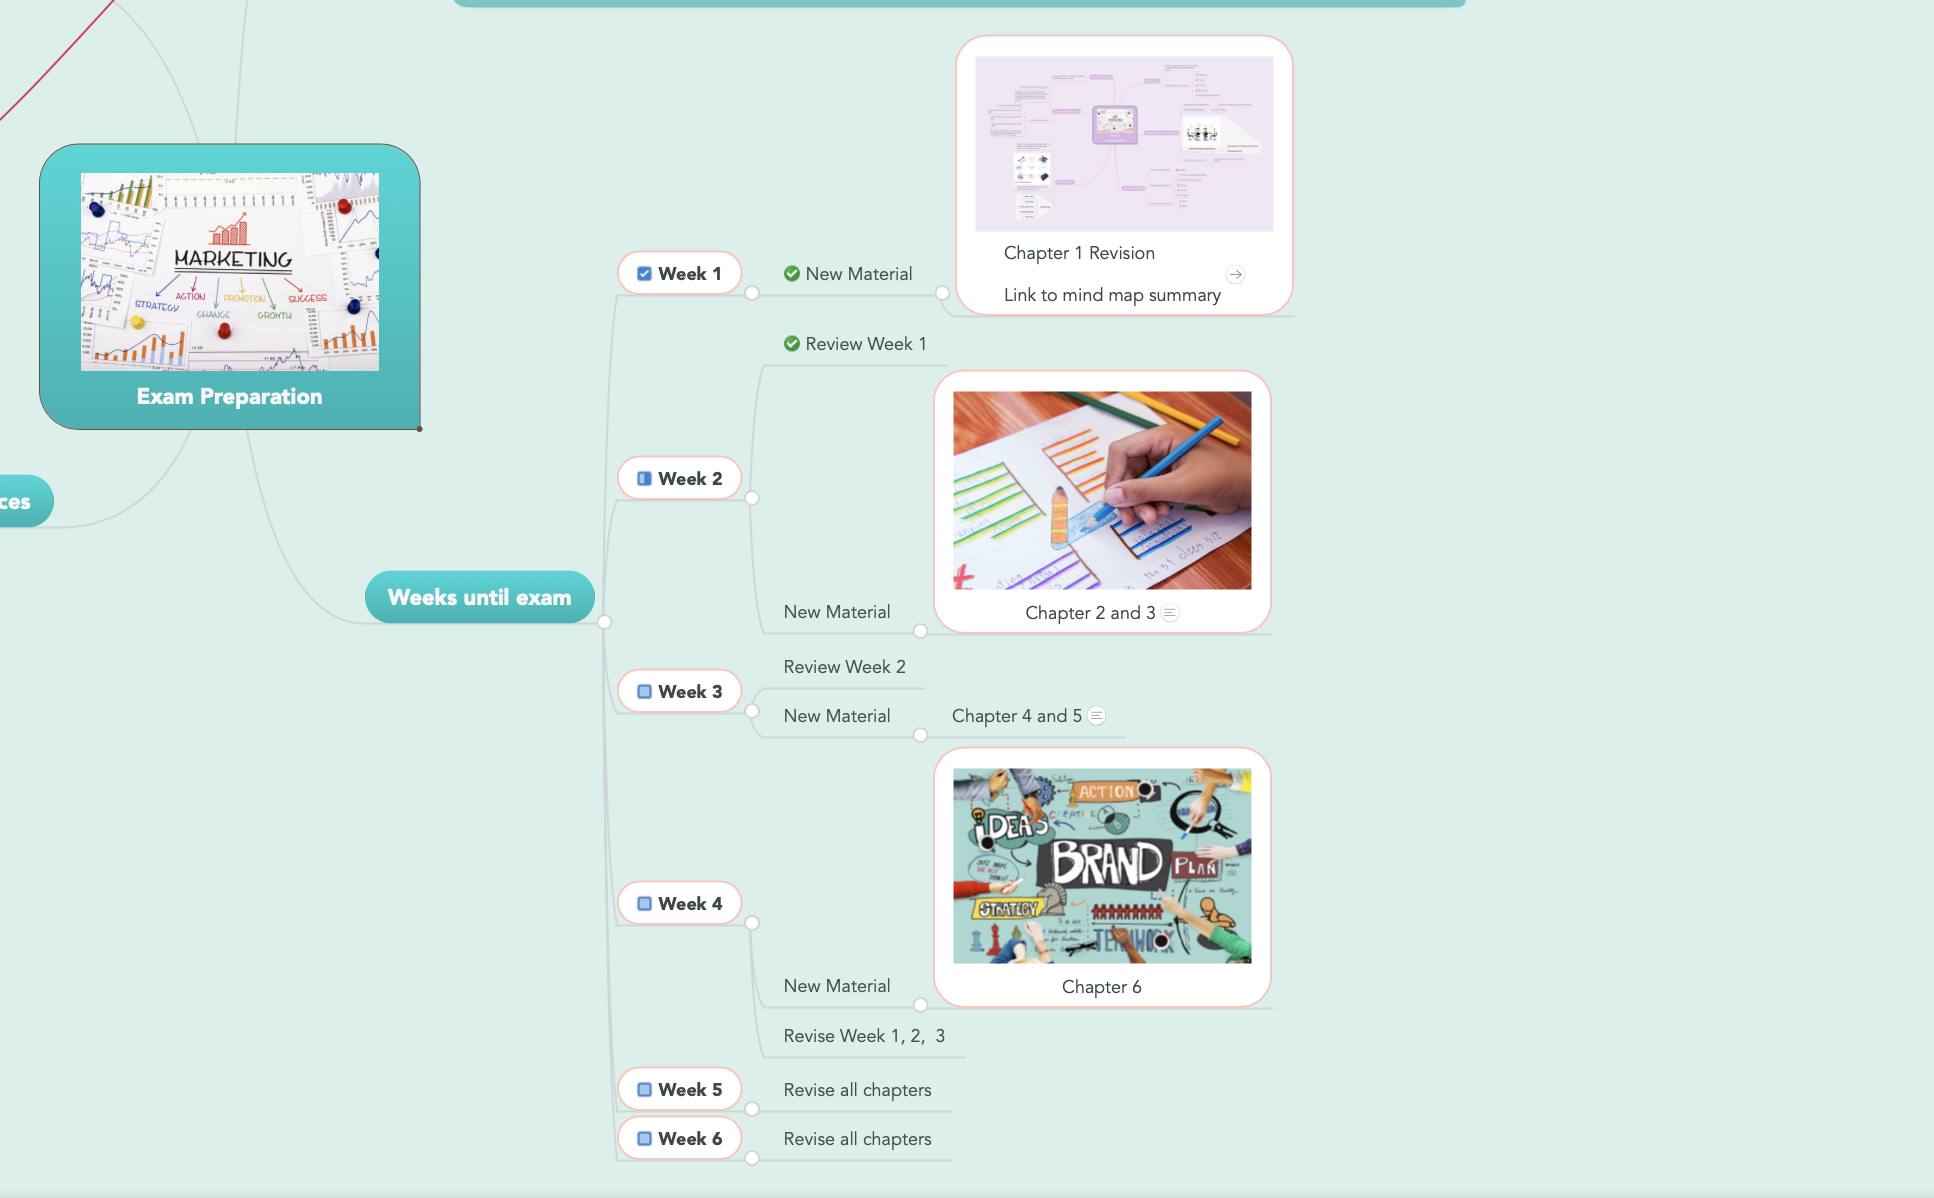
- Weeks until exam is where the magic happens. Your personal countdown aka action plan. Separate the weeks by the study material you’d like to cover. This could be by lectures or by textbook chapters for example. Don’t forget to schedule in time for revision and to keep track of your progress by marking your completion status. Easy peasy.
- Resources is where you’d link to your research, summaries, completed assignments, past exam papers, lecture notes and other mind maps that you’ve created. Turn your mind map into your own personal hub of information.
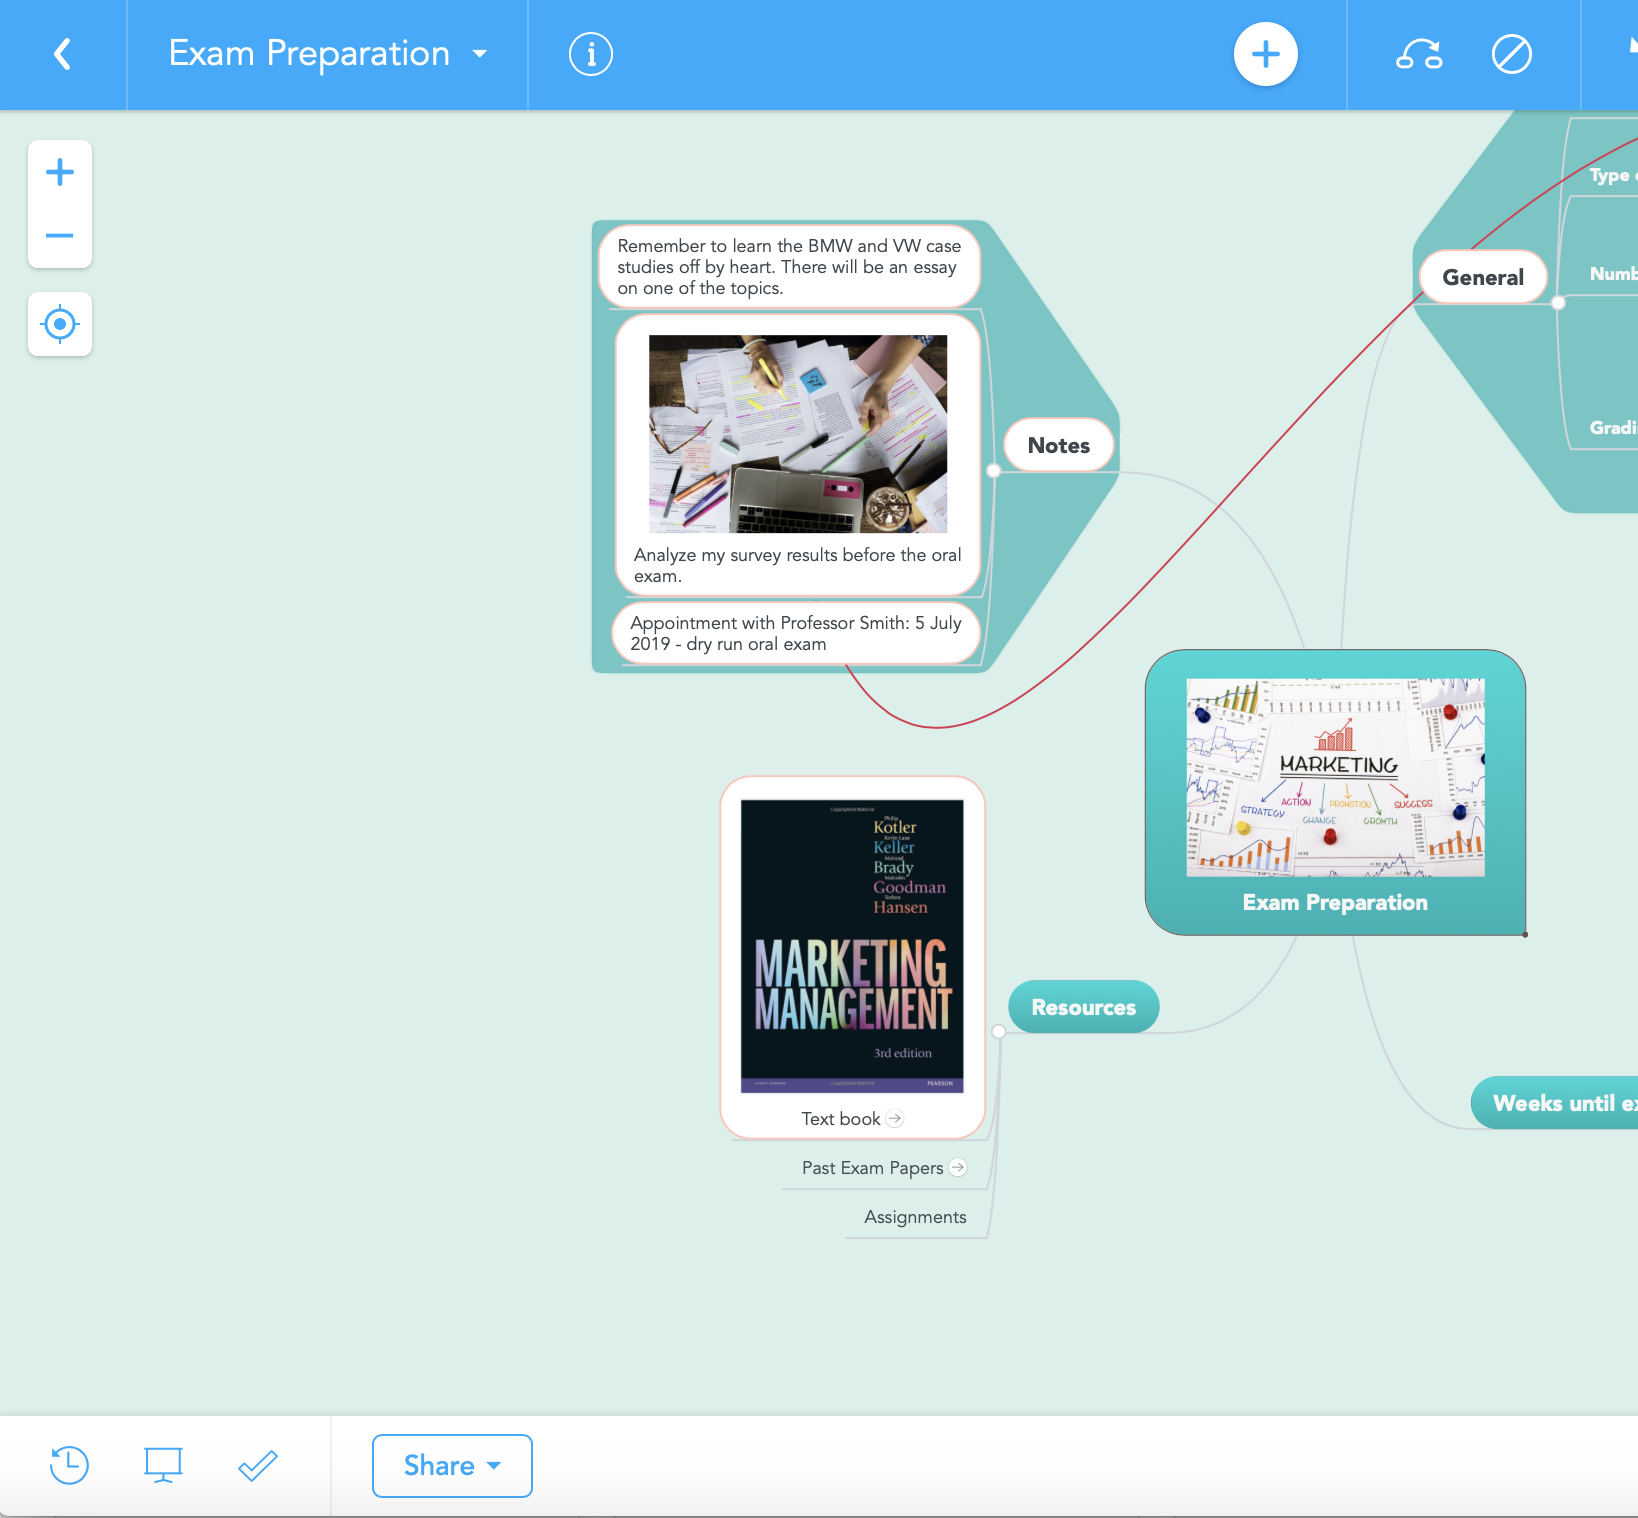
- And finally, make use of the notes section to add any additional tit-bits of information. An example could be the one-on-one appointment that you’ve just scheduled with your professor where you’d dry-run your oral exam, or the case studies that are important to study for the essay section in your exam. The sky’s the limit.
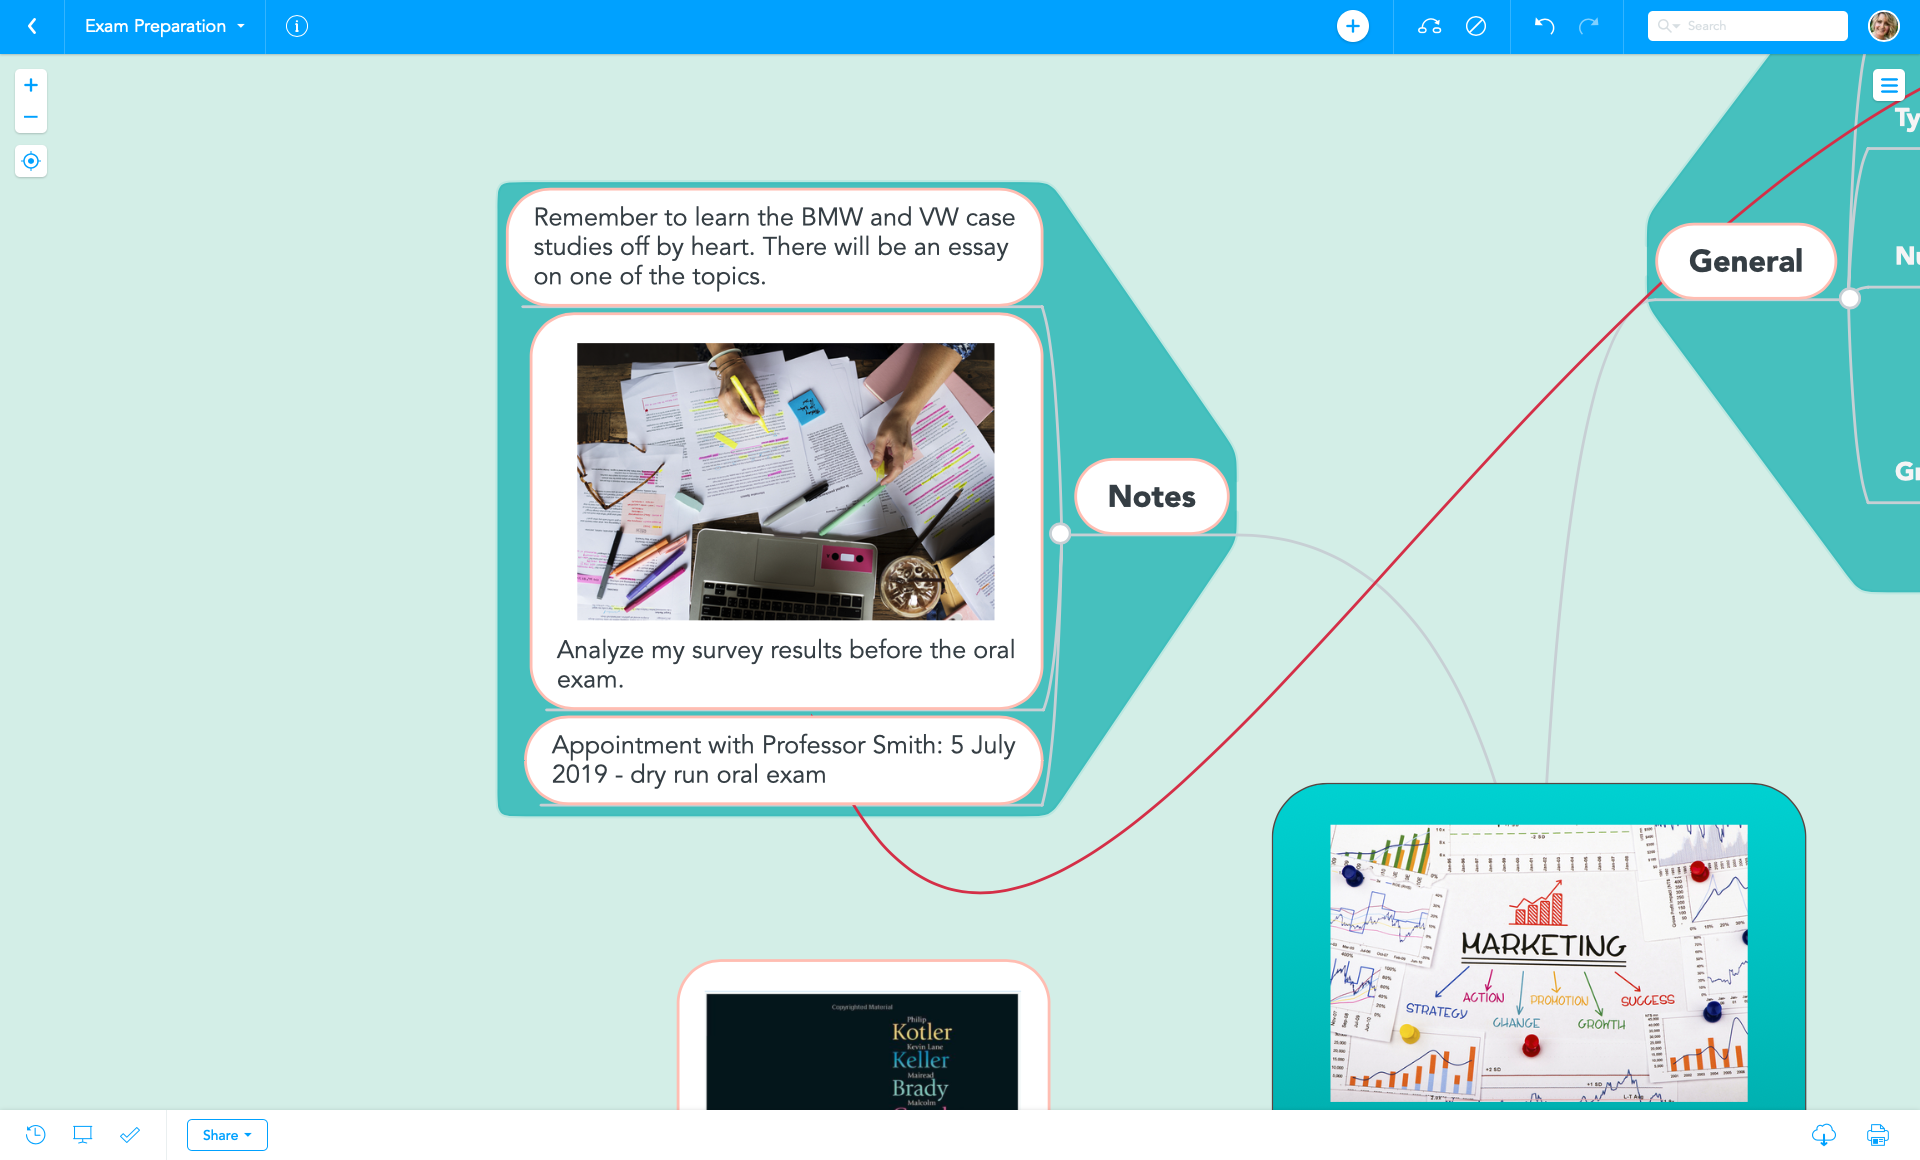
Using a mind map to prepare for your exam will help you:
- Keep track of all the things you need to do in order to pass,
- Mark off what’s been completed (with progress icons) so that you know what still needs to be studied,
- Store and manage all your resources in one centralized place,
- Expand on, update and make changes in real-time,
- And finally, maintain an overview of everything relating to your exam
