In fast-paced projects, task management on the go is essential to ensuring your team stays as productive as possible. Our latest updates to MeisterTask for iOS are all about keeping your projects accessible and close at hand: read on to find out more.
The MeisterTask apps for iPad and iPhone enable quick and easy access to your projects wherever you are. We’ve made a number of crucial changes to make our on-the-go experience faster and smoother than ever before. Let’s see what’s new.
1. Widgets
The most important part of our latest update coincides with a significant update for iOS 14: widgets.
Widgets are bite-size chunks of app information that can be seen without the need to open the app itself. While widgets for iOS aren’t new (they’ve been part of the “today view” for a while now), iOS 14 is important because it allows you to add widgets to your home screen too. This means greater license to customize your home screen by making the apps you use most more prominent.
Home screen widgets will only be available for iOS 14 on iPhone. Although iPad users will also be able to use widgets, these will only be available from the today view.
Widgets for MeisterTask
Naturally, the latest version of MeisterTask for iOS allows you to utilize the power of widgets in your own task management processes. Here’s what you can do with widgets:
- Add dedicated MeisterTask widgets to your home screen to display important information from your tasks.
- Customize the appearance and content of the MeisterTask widgets on your home screen with different widget sizes/styles.
- Decide which information is displayed. Currently, you can select from My Checklist, My Tasks, or any project section in any task you are part of.
Once you’ve added some MeisterTask widgets to your home screen, you can use the feature to make task management faster and easier. Here’s how:
Filter Relevant Information
When you’re on the go, we know that speed is key. As you’ll probably only want to keep an eye on a couple of your most important tasks in MeisterTask while you’re away from your computer, widgets are a perfect way of keeping things streamlined. While the option to open the full MeisterTask app is always available, widgets help you focus on what really matters in a compact, at-a-glance view, straight from your home screen.
Use Widgets as Shortcuts
We received a lot of user requests for shortcuts to specific tasks: with widgets, we’ve turned this into a reality. Once you’ve set up your widgets, you can open any displayed task or project section with just one tap. No need to click through MeisterTask.
Create Mini-dashboards on Your Home Screen
You can arrange widgets on your home screen in any order you like: the more MeisterTask widgets you place on there, the more task information you will see. With enough widgets, you’ll gain a good overview of your own to-dos as well as other tasks that are open in selected projects, similar to the dashboard in MeisterTask.
If you want a large amount of task information but need to save space on your home screen, you can stack multiple MeisterTask widgets (see below). This allows you to group the most important widgets together (up to ten) and access the relevant tasks easily.
Create a MeisterTask Widget
- Tap and hold an empty area of the home screen until the icons start to “jiggle” (edit mode).
- Tap the plus sign (+) in the top-left corner of the screen.
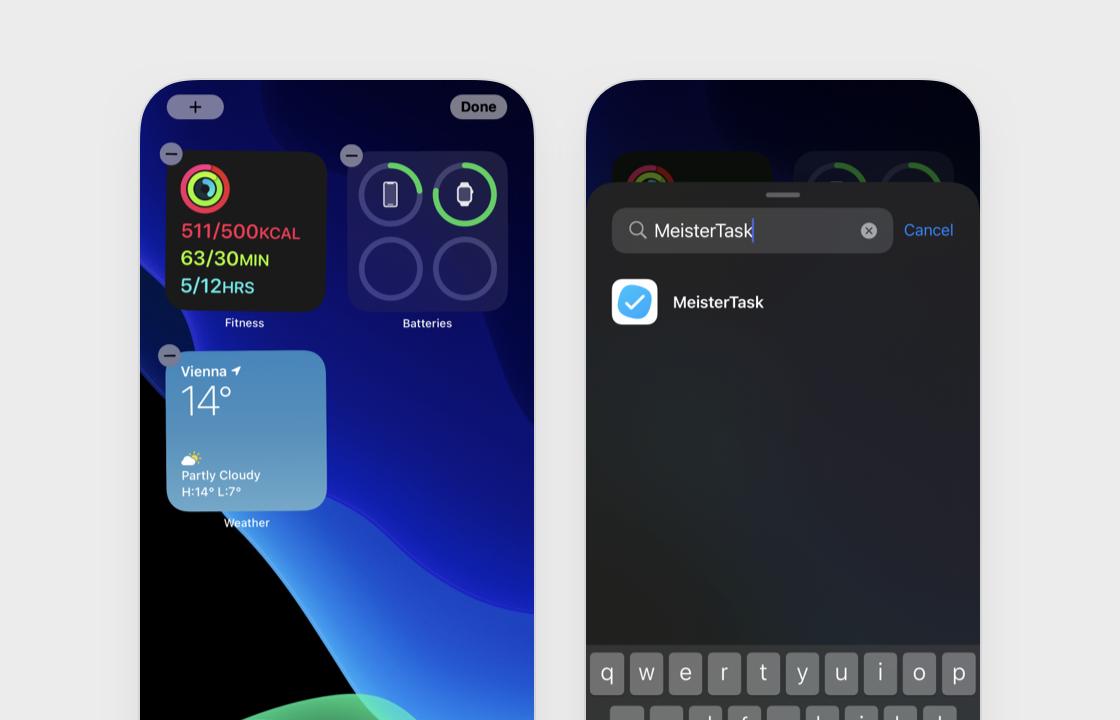
- Find the MeisterTask widget on the list (or enter MeisterTask into the search bar).
- Select the MeisterTask widget, then tap anywhere on the screen to exit edit mode.
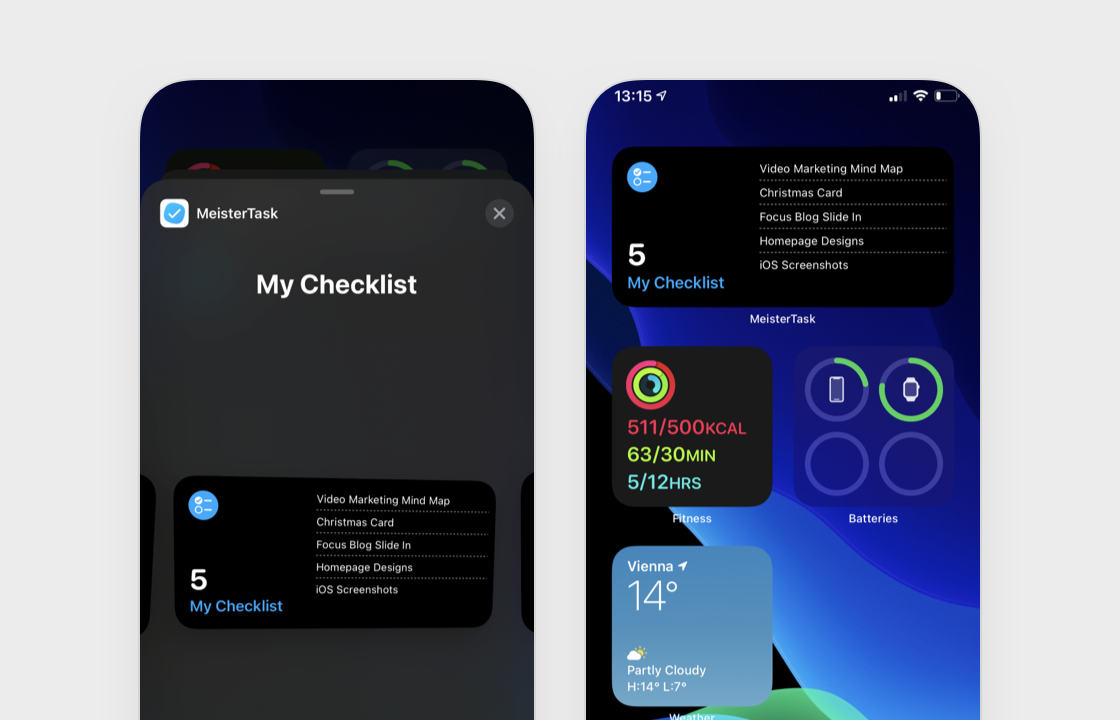
The first time you tap on the widget, you’ll be able to define whether that widget should display My Checklist, My Tasks, or a project section. If you select a project section widget, you can decide which section is to be displayed by long-pressing the widget, then selecting “edit widget”.
Create a MeisterTask Widget Stack
Widget stacks are groups of widgets that are placed “on top of each other” in order to save space on the home screen. While you could theoretically place widgets from any app you like in the same stack, it makes sense to organize them logically.
For example, if you wanted to display widgets for a variety of sections in the same MeisterTask project, stacking them together would allow you to flip through the latest updates for each section of the project. Alternatively, you could even create multiple stacks so that your entire home screen replicates your MeisterTask dashboard.
To create a widget stack:
- Create a MeisterTask widget for your home screen by following the steps above.
- Create a second MeisterTask widget.
- Tap and hold the second widget to select it. Then, drag and drop it onto the first.
- Tap away from the stack to save changes.
To create a stack, all your widgets must be the same size and shape.
Repeat steps 2 and 3 to add more widgets to the stack. To see each MeisterTask widget in the stack from the home screen, swipe up or down on the displayed widget to get to the next one (like in the video below).
2. Attachments
Attachments are an important part of task management for many MeisterTask users on iOS. We’ve made a couple of important changes to the way attachments work, detailed below.
Set a Favorite Attachment
In MeisterTask, we use attachment icons as thumbnails so that you can easily recognize certain tasks when they are listed on your project board. As standard, the attachment thumbnail shown is from the last file that was added to the task.
However, this sometimes results in the wrong image being shown, which can be confusing and/or annoying for people looking at the task. For example, if you’re a graphic designer attaching dozens of images to a task, you’ll probably want to use a good overview image as the task thumbnail, rather than a button or another small design element.
That’s why, to make sure your tasks are as easy to understand as possible, we’ve added the option for you to decide which attachment thumbnail should be shown.
This feature replaces the automatic selection of task thumbnails. If you do not select a thumbnail, none will be shown.
To set an favorite attachment in iOS:
- Open a task and find the attachment you want to pin as the thumbnail.
- Tap on the attachment to open it.
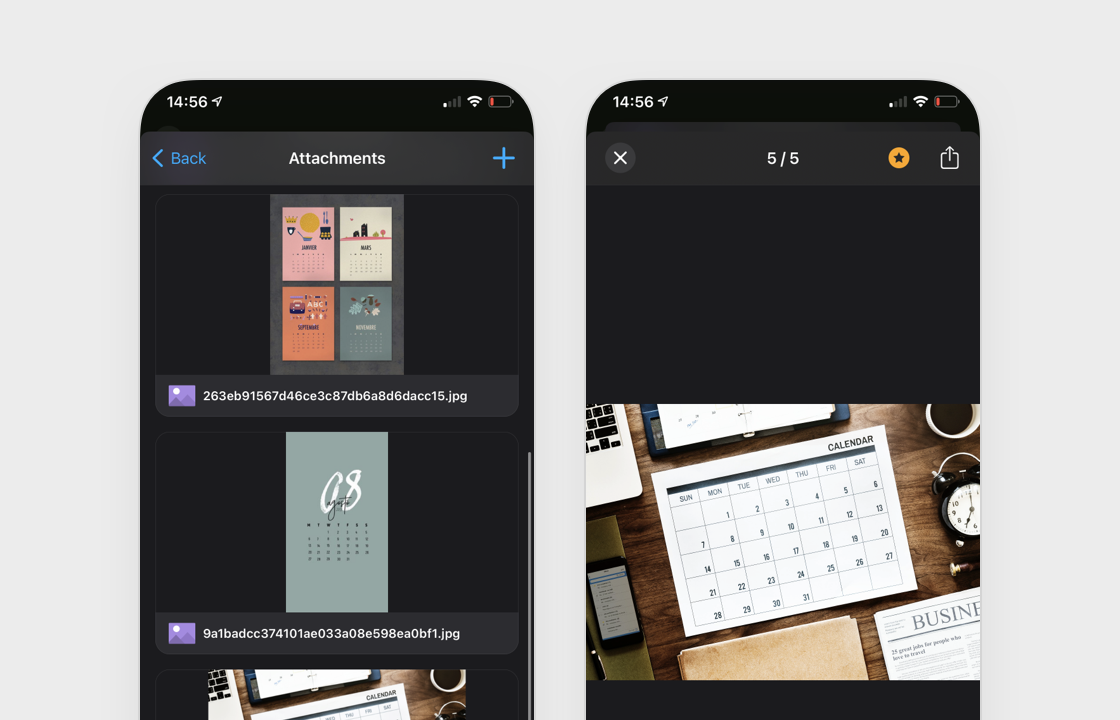
- Tap the star in the top right of the screen to set that image as the thumbnail. Tap the star again to deselect this attachment as the thumbnail.
Or:
- Open a task and find the attachment you want to pin as the thumbnail.
- Open the popover menu by long-pressing the attachment thumbnail.
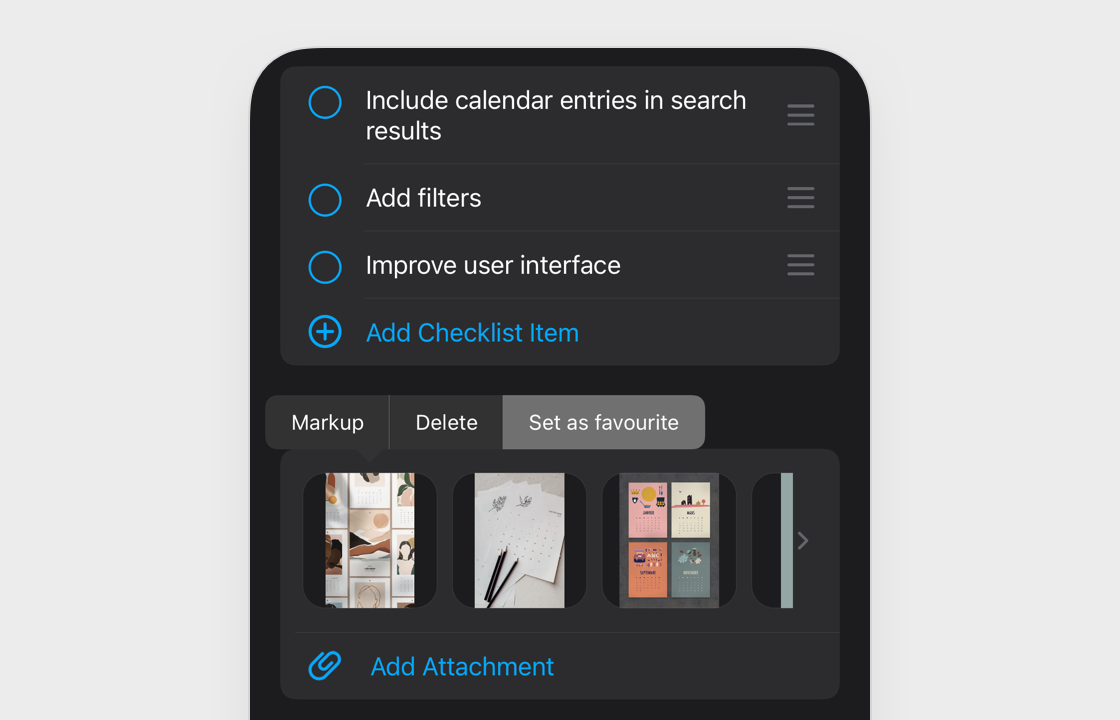
- Click “Set as Favorite” to set that image as the thumbnail (“Remove as Favorite” to deselect).
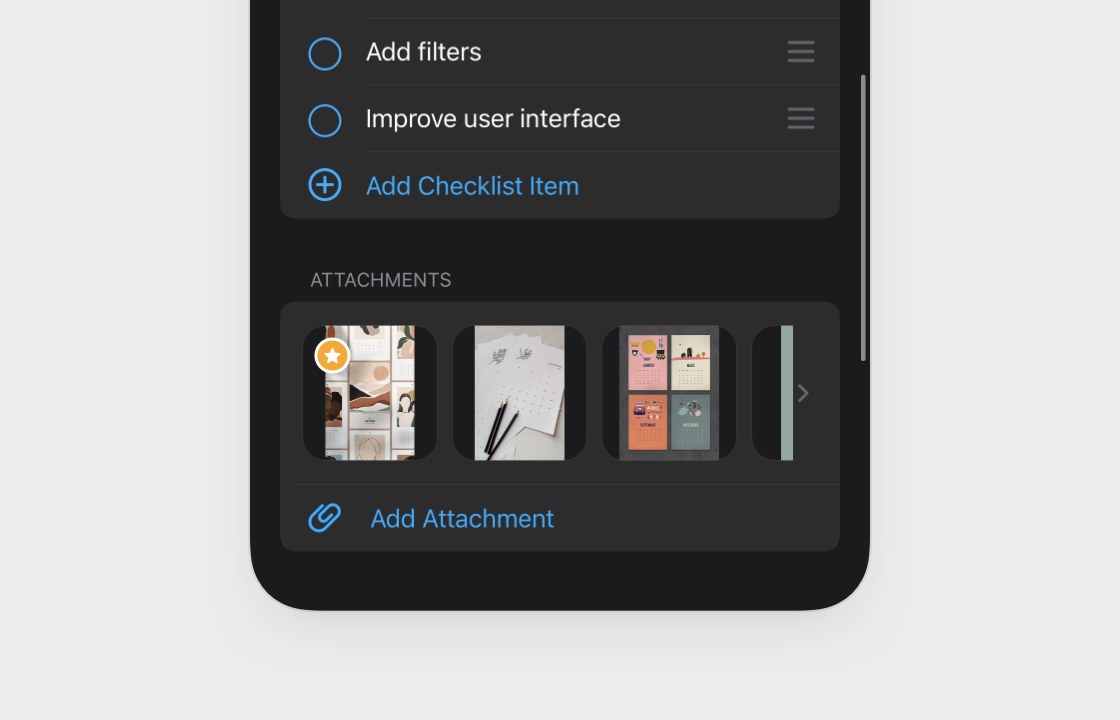
The selected attachment will be displayed as the task thumbnail until it is deselected or a new thumbnail is selected in its place. Only attachments with thumbnails can be selected.
Please note that you won’t be able to use this feature if the task is a recurring task, the task is archived or trashed, or if you only have comment or view-only permissions for the project the task belongs to.
Link Attachments in Comments
In tasks with longer comment threads and multiple attachments, it can sometimes be difficult to keep the discussion on-topic. This is particularly true when referring to attachments: “In the attached file” is a useful phrase, unless of course there are two or more attachments on the task and you don’t know which attachment is meant.
To reduce the confusion, we’ve made it possible to create links to attachments in comments using the forward slash (/) key. This creates a shortcut to the attachment in question without the need to re-upload.
Currently, mobile users will only be able to open links to attachments that were created on a desktop version of MeisterTask. The ability to create links to attachments on iOS will be added in the coming weeks — we’ll let you know as soon as that’s ready.
3. Other Updates
- We’ve created keyboard shortcuts for a variety of MeisterTask functions on iPad. You can view the full list of keyboard shortcuts by pressing and holding the Cmd key.
- MeisterTask for iOS now features automatic cursor placement to make creating new tasks, sections and projects quicker and easier.
- We’ve made improvements to project filters: setting, modifying and clearing filters is now simpler than ever.
- We’ve added the option to restrict invite suggestions from the accounts interface. Go to My Account > Settings to change your preferences (team admins only).
App, App and Away!
MeisterTask for iOS is always improving: we’ll be adding new features and enhancements in the coming weeks and months. Stay tuned to our blog and follow us on Twitter @MeisterTask to keep your finger on the pulse of change.
